The Ultimate Guide to Irresistible Homemade Cheesy Breadsticks
There’s a certain kind of magic that happens in the kitchen when simple, humble ingredients are transformed into something truly spectacular. It’s a magic that doesn’t require a chef’s hat or years of training, but just a little bit of time and a whole lot of love. And few things capture this edible alchemy quite like a batch of warm, golden, pull-apart Homemade Cheesy Breadsticks.
Forget the cardboard box and the generic, often stale, sticks from the chain pizza place. We’re talking about the real deal: soft, fluffy, and tender breadsticks, baked from a simple scratch dough, lavishly brushed with garlic-infused butter, and smothered in a blanket of bubbling, stretchy mozzarella cheese. These Homemade Cheesy Breadsticks are not just a side dish; they are the main event, the star of the snack table, the perfect companion to a bowl of steaming soup, and the undeniable highlight of any family pizza night.
More breakfast ideas you’ll love
Related posts:
This guide is your one-stop resource for creating the most unforgettable Homemade Cheesy Breadsticks of your life. We’ll walk through the process step-by-step, delve into the science of the perfect dough, explore endless variations, and, of course, provide that crucial Final Thoughts to ensure your baking success. So, preheat your imagination and let’s get started on this journey to cheesy, bread-y bliss.
Why Go Homemade? The Unbeatable Appeal
You might be wondering, “Why go through the effort when I can just order some?” The answer lies in the profound difference between mass-produced and handcrafted food.
-
Control Over Ingredients: When you make Homemade Cheesy Breadsticks, you decide exactly what goes in. No unpronounceable preservatives, no excessive sodium, and no questionable cheese blends. You use real butter, fresh garlic, and high-quality cheese.
-
The Aroma Therapy: The process of baking bread is one of the most comforting sensory experiences. The smell of yeast blooming, the earthy scent of flour, and the final, intoxicating aroma of baking garlic and cheese wafting through your home is a reward in itself.
-
The Taste and Texture: Fresh-from-the-oven bread has a texture that cannot be replicated. The exterior is slightly crisp from the butter, while the interior remains cloud-soft. The cheese is molten and stretchy in a way that reheated cheese never can be.
-
A Labor of Love: Serving someone something you made from scratch is an act of care. These breadsticks carry the warmth and intention of your effort, making them taste all the better.
Deconstructing the Perfect Homemade Cheesy Breadstick: The Ingredients
Let’s break down the components that make this recipe a guaranteed winner. Understanding the “why” behind each ingredient empowers you to become a better baker.
For the Dough: The Foundation of Fluff
The dough is the soul of your Homemade Cheesy Breadsticks. It’s what provides the satisfying chew and the soft, airy structure.
-
Active Dry Yeast: This is the tiny living organism that makes our bread rise. When activated by warm water (around 110°F is ideal) and fed a little sugar, it ferments and produces carbon dioxide bubbles. These bubbles get trapped in the gluten network of the dough, causing it to inflate and become light and airy. The “foamy” stage is your visual confirmation that the yeast is alive and active—a crucial first step!
-
Warm Water: The temperature is key. Too cold, and the yeast won’t wake up. Too hot, and you’ll kill it. Think of the temperature of a perfect baby bath—warm to the touch but not hot.
-
Sugar: This is the yeast’s favorite food. A mere teaspoon is enough to get the party started, giving the yeast the energy it needs to produce gas and contribute to a beautifully risen dough.
-
All-Purpose Flour: The workhorse of the baking world. It provides the structure through the development of gluten. When we knead the dough, we align and strengthen these gluten strands, creating a network that can stretch and hold the gas from the yeast.
-
Salt: Salt is a flavor enhancer, but it also plays a functional role. It strengthens the gluten structure and, importantly, it regulates the yeast’s activity, preventing it from going wild and over-fermenting.
-
Olive Oil: This adds richness and tenderness to the crumb. Fat coats the gluten strands, resulting in a softer, more supple dough that’s easier to work with and yields a more tender final product.
For the Topping: The Crown of Flavor
This is where the “cheesy” in Homemade Cheesy Breadsticks truly shines.
-
Shredded Mozzarella: The undisputed king of pizza-topping cheeses. Its high moisture content and fantastic meltability create that iconic, irresistible cheese pull. For the best results, I highly recommend shredding a block of low-moisture, whole-milk mozzarella yourself. Pre-shredded cheese is often coated with anti-caking agents like potato starch or cellulose, which can prevent it from melting as smoothly.
-
Cheddar or Gruyère (Optional): While mozzarella is perfect for meltiness, it can be a little mild in flavor. Adding a small amount of a more robust cheese like sharp cheddar or nutty, complex Gruyère introduces a deeper, more sophisticated cheesy flavor that elevates the entire experience.
-
Butter & Garlic: This dynamic duo is non-negotiable. Brushing the dough with melted butter before baking creates a golden, slightly crisp base for the cheese to adhere to. Infusing that butter with freshly minced garlic (absolutely use fresh for the best flavor!) provides that quintessential, aromatic punch that makes these breadsticks impossible to resist.
-
Italian Seasoning: A convenient and flavorful blend of dried herbs like oregano, basil, thyme, and rosemary. It adds a touch of earthy, Italian-inspired flavor that complements the cheese and garlic perfectly.
-
Red Pepper Flakes: A pinch sprinkled over the top before baking introduces a gentle, warming heat that cuts through the richness of the cheese and butter. It’s an optional step, but one I highly recommend for those who enjoy a little kick.
The Art of the Process: A Step-by-Step Deep Dive
Creating these Homemade Cheesy Breadsticks is a simple process, but paying attention to the details will yield a dramatically superior result.
Step 1: Awakening the Yeast
In your large mixing bowl, combine the warm water (test it on your wrist—it should feel warm but not hot), sugar, and yeast. Give it a gentle stir and walk away for 5-10 minutes. This is your first test of success. You should return to a foamy, creamy, slightly domed layer on top of the water. If you don’t, your yeast may be old, or your water was the wrong temperature. It’s best to start over at this point to avoid disappointment later.
Step 2: Creating the Dough
Once your yeast is frothy, it’s time to build the dough. Add the olive oil, salt, and begin incorporating the flour, one cup at a time. I recommend stirring with a wooden spoon or a dough whisk until a shaggy mass forms. Once it becomes too difficult to stir, it’s time to use your hands.
Step 3: The Knead for Speed (and Texture)
Turn the dough out onto a lightly floured surface. Kneading is not about brute force; it’s a rhythmic process of pushing, folding, and turning. Push the dough away from you with the heel of your hand, fold it back over itself, give it a quarter turn, and repeat. You’re developing the gluten network, which is what gives the bread its structure and chew. Knead for 5-7 minutes. How do you know it’s done? The dough will transform from a sticky, shaggy mess into a smooth, soft, and elastic ball. You can perform the “windowpane test”: gently stretch a small piece of dough between your fingers. If you can stretch it thin enough that light passes through without it tearing immediately, your gluten is well-developed.
Step 4: The First Rise – A Lesson in Patience
Place your beautiful, smooth dough ball back into a lightly oiled bowl, turning it once to coat it in oil. This prevents a skin from forming. Cover the bowl with a clean kitchen towel or plastic wrap and place it in a warm, draft-free spot. The top of your oven (while off) or inside a microwave are great options. Let it rest for 45-60 minutes, or until doubled in size. This is not a step to rush. This fermentation period allows the yeast to work its magic, developing flavor and creating that light, airy texture we crave.
Step 5: Shaping and Topping
Once the dough has doubled, punch it down gently to release the large air bubbles. Turn it out onto your work surface and, using a rolling pin, roll it into a rectangle roughly the size of your baking sheet (about 9×13 inches). Transferring it to a parchment-lined baking sheet makes for easy cleanup and prevents sticking. Now, for the fun part! Brush the entire surface generously with your garlic-infused melted butter, leaving a small border around the edges. This buttery layer is the glue for the cheese and the source of immense flavor. Sprinkle the cheese evenly over the top, going all the way to the edges for those delightfully crispy, cheesy bits.
Step 6: The Final Bake
A hot oven is essential. 425°F (220°C) is the perfect temperature to achieve a quick “oven spring” (a final burst of rising) and to cook the dough through while melting and browning the cheese to perfection. Bake for 12-15 minutes. Keep an eye on it! You’re looking for bubbly, lightly spotted cheese and golden-brown edges. Every oven is different, so trust your eyes.
Step 7: The Finishing Touches
As soon as the Homemade Cheesy Breadsticks emerge from the oven, you have one more opportunity to add flavor and gloss. A quick brush with a little more melted butter (garlic or plain) will make them glisten and add an extra layer of richness. Let them cool for just a minute or two on the pan—this allows the cheese to set slightly, making them easier to slice. Use a pizza wheel or a sharp knife to slice them into sticks. Serve immediately with sides of warm marinara sauce, creamy ranch dressing, or a rich garlic aioli for dipping.
Beyond the Basic: Creative Variations on Your Homemade Cheesy Breadsticks
The classic recipe is a masterpiece, but the canvas is yours to paint. Once you’ve mastered the base, feel free to get creative!
-
The Supreme: Before adding the cheese, scatter some finely diced pepperoni, cooked Italian sausage, sliced black olives, and chopped green bell pepper over the buttered dough. Then, top with cheese for a full-meal breadstick.
-
The Garden Veggie: Add a pop of color and freshness with finely chopped sun-dried tomatoes, fresh spinach, and thinly sliced red onion. For mushrooms, sauté them first to remove excess moisture.
-
The Three-Cheese Heaven: Combine mozzarella with freshly grated Parmesan and a bit of creamy, melty fontina cheese for an incredibly decadent, multi-dimensional cheesy experience.
-
The Everything Bagel: After brushing with butter, skip the Italian seasoning and instead sprinkle a generous amount of “Everything Bagel” seasoning mix over the cheese before baking. The sesame seeds, poppy seeds, garlic, and onion create a fantastic texture and flavor.
-
Breadstick “Buns”: Instead of rolling into a rectangle, divide the dough into 8 equal pieces. Roll each into a log and place them slightly apart on the baking sheet. Brush with butter, sprinkle with garlic and a little cheese, and bake. These make fantastic, soft “buns” for sandwiches or sloppy joes.
Storing and Reheating: Preserving the Magic
While these Homemade Cheesy Breadsticks are truly at their peak straight from the oven, leftovers can still be delicious if handled properly.
-
Storing: Allow any leftover breadsticks to cool completely. Store them in an airtight container or a resealable plastic bag at room temperature for up to 2 days.
-
Reheating (The Right Way): To recapture that fresh-baked texture, never use the microwave, which will make them soft and rubbery. Instead, reheat them in a conventional oven or toaster oven preheated to 350°F (175°C). Place them on a baking sheet and warm for 5-10 minutes, until the cheese is melty again and the exterior is crisp.
-
Freezing for Later: These breadsticks freeze beautifully. After baking and completely cooling, place them in a single layer on a baking sheet to “flash freeze” for an hour. This prevents them from sticking together. Then, transfer the frozen breadsticks to a freezer-safe bag or container. They’ll keep for up to 3 months. Reheat from frozen in a 350°F oven for 10-15 minutes.
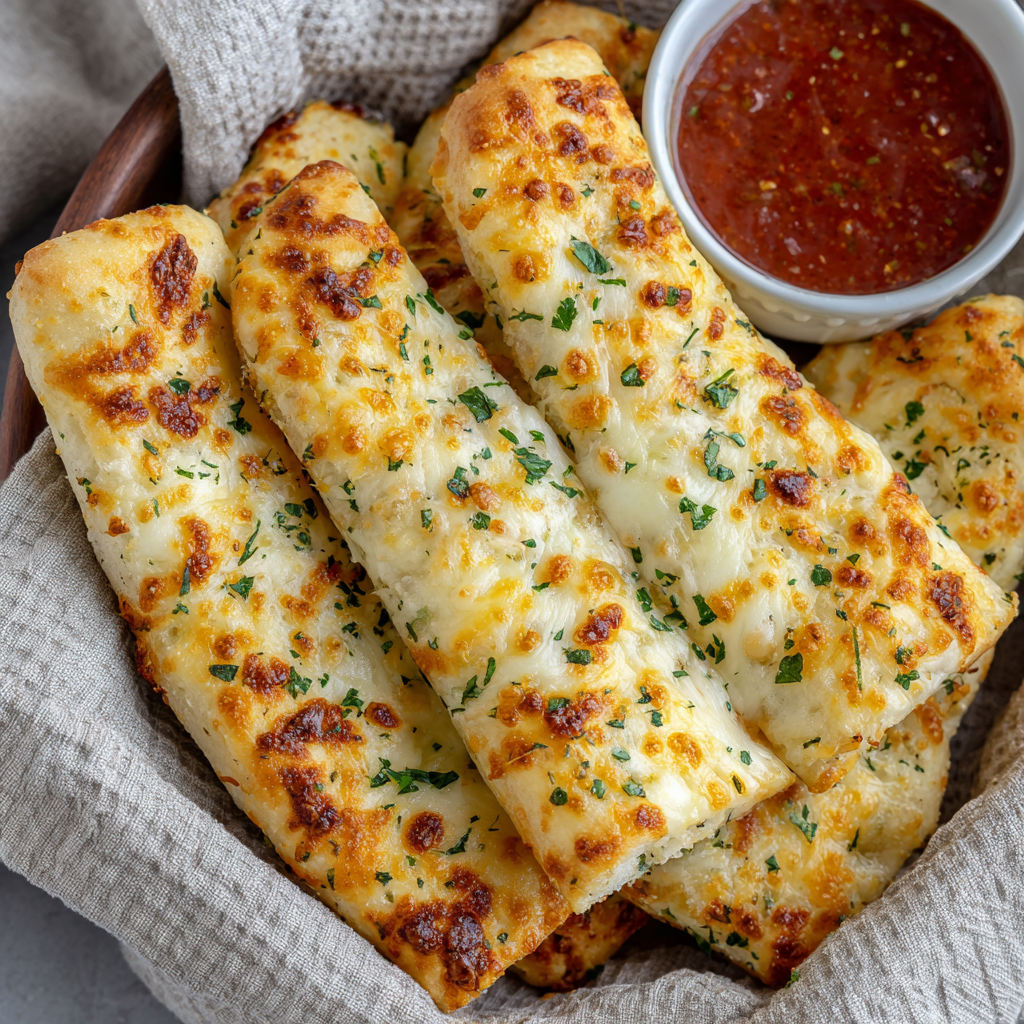
The Ultimate Guide to Irresistible Homemade Cheesy Breadsticks

Soft, warm, and loaded with melty cheese, these Homemade Cheesy Breadsticks are the ultimate comfort snack. They’re easy to make from scratch, bake in minutes, and pair perfectly with pizza night, soups, or dipping sauces. If you love bakery-style breadsticks, this version is even better — fresh, buttery, and customizable!
- Author: alae
Ingredients
For the Dough
-
2¼ tsp active dry yeast (1 packet)
-
1 cup warm water (about 110°F / 43°C)
-
1 tsp sugar
-
2½ cups all-purpose flour
-
1 tsp salt
-
2 tbsp olive oil
For the Topping
-
1½ cups shredded mozzarella
-
¼ cup shredded cheddar or Gruyère (optional, for extra flavor)
-
3 tbsp unsalted butter, melted
-
2 cloves garlic, minced
-
1 tsp Italian seasoning
-
Optional: pinch of red pepper flakes or flaky salt
Instructions
-
Activate the Yeast
In a large bowl, combine warm water, sugar, and yeast. Let it rest for 5–10 minutes until foamy. -
Make the Dough
Add flour, salt, and olive oil. Mix until the dough forms, then knead for 5–7 minutes until smooth and elastic. -
Let It Rise
Cover the bowl with a towel and let the dough rise in a warm place for 45–60 minutes, or until doubled in size. -
Prep the Pan
Preheat the oven to 425°F (220°C). Line a baking sheet with parchment paper. -
Shape the Dough
Roll the dough into a 9×13-inch (23×33 cm) rectangle and transfer to the prepared sheet. -
Add the Toppings
Brush with melted butter, then sprinkle garlic and Italian seasoning. Add all the cheese on top. -
Bake
Bake for 12–15 minutes, or until the cheese is melted and bubbly and the edges are golden. -
Serve
Brush with extra butter if you’d like. Slice into breadsticks and serve warm with marinara, ranch, or garlic sauce.
Notes
-
Let the dough fully rise — this gives the breadsticks their soft, fluffy texture.
-
Use a mix of cheeses for deeper flavor. Mozzarella melts perfectly, but cheddar, Gruyère, or Muenster add richness.
-
Want heat? Add red pepper flakes or sliced jalapeños before baking.
-
Make ahead: Bake and freeze. Reheat at 350°F (175°C) for 8–10 minutes.
-
Don’t overbake — pull them out as soon as the cheese browns lightly.
Nutrition
- Calories: 170 kcal per serving
- Carbohydrates: 20g
- Protein: 7g
Final Thoughts
Embarking on the journey of making Homemade Cheesy Breadsticks from scratch is more than just following a recipe; it’s an invitation to engage in one of life’s most simple and satisfying pleasures. It connects you to the timeless tradition of bread-making, filling your home with an aroma that signals comfort, care, and impending deliciousness. These breadsticks have the power to turn a simple weeknight pasta dinner into a special occasion and to make a casual movie night feel like a celebration.
The process, from watching the yeast bloom to pulling that golden, cheesy masterpiece from the oven, is a rewarding experience that builds confidence in the kitchen. It demystifies the art of baking, proving that with a handful of pantry staples and a bit of patience, you can create something far superior to anything found in a freezer aisle.
So, the next time a craving for warm, cheesy, garlicky bread strikes, I urge you to resist the temptation of the delivery app and reach for your flour bin instead. Gather your ingredients, clear your counter, and give this recipe a try. The process is therapeutic, the result is profoundly delicious, and the joy of sharing your creation with others is the ultimate reward. In a world of fast food and instant gratification, these Homemade Cheesy Breadsticks are a beautiful, bubbling, glorious reminder that the best things in life are worth making from scratch.