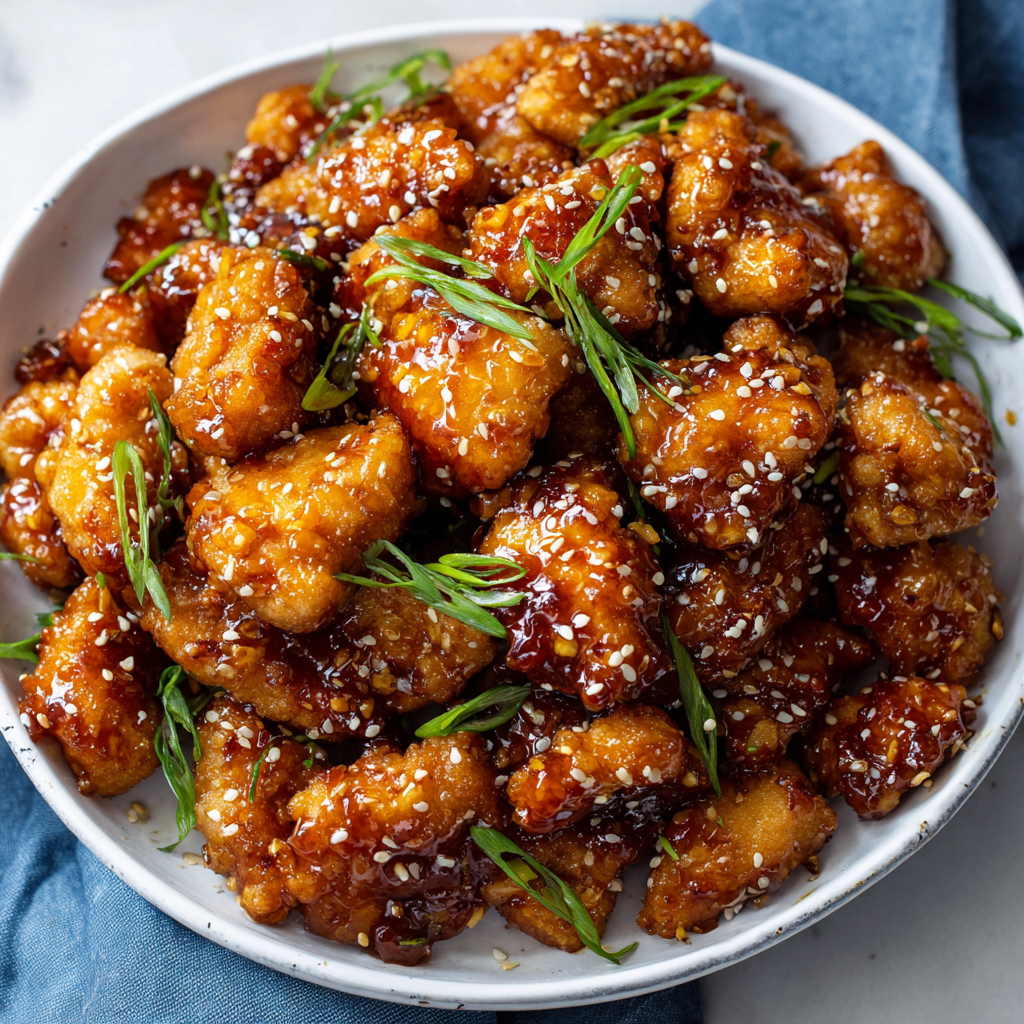
Unlock Takeout Magic: Your Guide to Perfect Crispy Chinese Honey Garlic Chicken (30 Minutes)
There’s a certain magic to that iconic takeout box. The anticipation of lifting the lid, the fragrant steam that escapes, and the promise of something truly irresistible inside. For many, the holy grail of these cravings is a dish that masterfully balances sweet and savory, crispiness and tenderness. That dish is often Crispy Chinese Honey Garlic Chicken (30 Minutes).
If you’ve ever thought that recreating this restaurant-quality masterpiece at home was a complex, day-long affair, prepare to have your mind—and your taste buds—delightfully changed. This recipe is your golden ticket to achieving that perfect, crackling-crisp exterior and a sticky, glossy, flavor-packed sauce, all in the time it would take for delivery to arrive. Yes, you can have Crispy Chinese Honey Garlic Chicken (30 Minutes) on your table, fresh from your own kitchen, and I’m here to show you exactly how.
More breakfast ideas you’ll love
Related posts:
- Unveiling Bang Bang Chicken: The Crispy, Spicy, Sweet Sensation You Need to Try
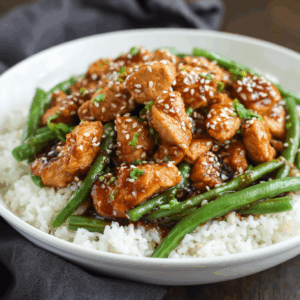
- Honey Garlic Chicken (Better Than Takeout, Ready in 20 Minutes)
- Marry Me Pasta: The Meatless Masterpiece That Lives Up To Its Name
- Your Quest is Over: The Ultimate Easy Patty Melt with Secret Sauce Recipe | Best Sandwich
This isn’t just another recipe; it’s a deep dive into the techniques, the science, and the little secrets that transform simple ingredients into an extraordinary meal. We’ll explore why the marinade works, how to achieve that unbeatable crispiness, and how to tailor the sauce to your exact preferences. So, tie on your apron, and let’s embark on this culinary adventure.
Why This Recipe for Crispy Chinese Honey Garlic Chicken (30 Minutes) is a Game-Changer
Before we get to the ingredients, let’s talk about why this specific formula is so effective and reliable.
-
The 30-Minute Promise: From prep to plate, this recipe is engineered for efficiency. The marinating time is cleverly short and happens while you heat the oil, meaning there’s no inactive waiting around. The frying is quick due to the small piece size, and the sauce comes together in a flash. It’s a perfectly choreographed kitchen dance.
-
The Secret to the Crisp: Many recipes use a heavy, complicated batter. This one uses a brilliant, minimalist marinade of egg whites and cornstarch. The egg whites create a protein-rich base that, when fried, puffs up into an incredibly light, airy, and shatteringly crisp coating that clings perfectly to the chicken. It’s a technique used in professional kitchens for a reason—it simply works better.
-
Sauce Simplicity: With only four core ingredients, the honey garlic sauce is a testament to the power of balance. The honey brings a floral sweetness, the garlic provides a pungent, aromatic backbone, the soy sauce adds the essential salty, umami depth, and the black pepper introduces a subtle, warming heat that cuts through the sweetness.
Deconstructing the Ingredients for the Ultimate Crispy Chinese Honey Garlic Chicken (30 Minutes)
Great dishes start with great ingredients. Understanding your components is the first step to mastery.
The Chicken: Thighs vs. Breasts
-
Chicken Thighs (Highly Recommended): For the most succulent and flavorful result, boneless, skinless chicken thighs are the winner. They have a higher fat content than breasts, which means they stay incredibly juicy and tender even through the high heat of frying. They are also more forgiving, so the risk of overcooking is lower.
-
Chicken Breasts: A fantastic leaner option. They yield a very clean, firm bite. The key is to not overcook them. Be precise with your frying time to ensure they don’t become dry. Cutting them into uniform pieces is even more critical here.
The Marinade: The Foundation of Crispiness
-
Egg Whites: This is the non-negotiable star. Whipping the egg whites with the cornstarch creates a frothy, protein-rich glue. When this hits the hot oil, the water in the egg whites rapidly vaporizes, creating tiny air pockets and setting the coating into a delicate, crisp shell. It’s the same principle behind tempura.
-
Cornstarch: This is our primary dry component. It doesn’t just thicken; when fried, it creates a beautifully crisp and slightly translucent crust that is far less dense and heavy than a flour-based coating.
The Honey Garlic Sauce: A Symphony in Four Parts
-
Honey: Use a good-quality, flavorful honey. The type of honey will influence the final taste. A wildflower honey will be more complex, while a clover honey will be milder and sweeter. For a deeper, almost caramel-like flavor, you can substitute half the honey with maple syrup.
-
Garlic: Fresh is best! Mince your own garlic for the most potent and aromatic flavor. The pre-minced jarred stuff can sometimes have a slightly off or muted taste. Don’t be shy here—garlic is in the name of the dish for a reason!
-
Soy Sauce: This provides the salty, umami counterpoint to the sweet honey. Use a standard all-purpose soy sauce. If you need to make this gluten-free, tamari is an excellent 1:1 substitute.
-
Black Pepper: Don’t underestimate this ingredient! The freshly ground black pepper isn’t just for heat; it adds a distinct, earthy aroma that prevents the sauce from being one-dimensionally sweet. It’s the sophisticated touch that elevates the entire dish.
The Step-by-Step Guide to Perfect Crispy Chinese Honey Garlic Chicken (30 Minutes)
Let’s transform these ingredients into the dish of your dreams. Follow these steps closely for foolproof results.
Equipment
-
A heavy-bottomed skillet with deeper sides or a wok
-
A frying or instant-read thermometer (highly recommended)
-
A wire rack set over a baking sheet (ideal) or a plate lined with paper towels
-
A slotted spoon or spider strainer
-
A medium-sized pot for the sauce
Ingredients
-
▢1 pound boneless, skinless chicken thighs or breasts, cut into 1-2 inch bite-sized pieces
-
▢Oil for frying (canola, vegetable, or peanut), enough to fill your skillet 1 inch deep
Marinade
-
▢2 egg whites
-
▢1 tablespoon cornstarch
-
▢Pinch of salt
Honey Garlic Sauce
-
▢4 tablespoon honey
-
▢2 cloves garlic, minced (or 3 if you’re a garlic lover!)
-
▢2 tablespoon soy sauce
-
▢1 teaspoon freshly ground black pepper
Garnish (optional but recommended)
-
▢Toasted sesame seeds
-
▢1 green onion, sliced
Instructions: A Masterclass in Method
1. GET ORGANIZED: The “Mise en Place” Mindset
This first step is the secret weapon of every great chef and is crucial for a seamless 30-minute cooking experience. Mise en place is a French term meaning “everything in its place.” Before any heat is applied, get everything ready.
-
Preheat Your Oven: Turn your oven to the “Warm” setting or 200°F/93°C. Place a baking sheet inside, optionally fitted with a wire rack. This is not for cooking, but for keeping your fried chicken batches perfectly crisp and warm while you finish the rest.
-
Prepare the Sauce: In the pot you’ll use for the sauce, simply combine the honey, minced garlic, soy sauce, and black pepper. Have it standing by. There’s no need to mix it yet; that will happen when you heat it.
-
Heat the Oil: Pour about 1 inch of oil into your skillet. Begin heating it over medium-high heat. If you have a thermometer, clip it to the side. Your target is 350-360°F/177-182°C.
Why this matters: Organization prevents panic. Having your staging area set up means you won’t be scrambling for a slotted spoon while your chicken is overcooking.
2. MARINATE THE CHICKEN: Creating the Crispy Shell
In a medium bowl, whisk the egg whites until they become frothy and loose. Add the cornstarch and a pinch of salt. Now, whisk vigorously until the mixture is well-blended and has a slightly fluffy, opaque consistency. This aeration is key to a light crust.
Add the bite-sized chicken pieces to the bowl and toss until every piece is thoroughly coated. Let it sit for 10-15 minutes. This is the perfect amount of time for the marinade to adhere and for your oil to come up to temperature.
3. HEAT THE OIL & FRY THE CHICKEN: The Pursuit of Perfect Crisp
This is the most critical stage. Proper oil temperature is non-negotiable.
-
With a Thermometer: Wait patiently until the oil reaches 350-360°F. This usually takes 10-15 minutes.
-
Without a Thermometer (Note 3): Dip the handle of a wooden spoon or a chopstick into the oil. If steady, active bubbles immediately form around the wood, the oil is ready. If it bubbles violently, it’s too hot. If only a few lazy bubbles appear, it’s not hot enough.
Frying in Batches:
-
Do Not Crowd the Pan. This is the number one mistake home cooks make. Adding too much chicken at once will cause the oil temperature to plummet, resulting in greasy, soggy chicken. You will likely need 2-3 batches.
-
Carefully add the chicken pieces one at a time, ensuring they aren’t sticking together.
-
Fry for 3-4 minutes, turning once halfway through, until the chicken is golden brown and cooked through. The internal temperature should be 165°F/74°C.
-
Use a slotted spoon to remove the chicken, letting excess oil drip back into the skillet. Place the finished batch on the wire rack or paper towels in your warm oven.
-
Bring the oil back to 350-360°F before adding the next batch. This ensures every piece is equally crisp.
4. MAKE THE SAUCE AND ASSEMBLE: The Grand Finale
By now, all your chicken should be fried, crispy, and waiting warmly in the oven. Take the pot with your pre-measured sauce ingredients and place it over medium-high heat.
Bring it to a boil and let it cook for just 1-2 minutes. You’ll see it bubble and begin to thicken slightly into a beautiful, glossy syrup. If it thickens too much for your liking, add a tablespoon of water to thin it out.
Now, add all the crispy chicken directly into the pot of sauce. Working quickly, toss the chicken until every single piece is gloriously coated in the sticky, aromatic honey garlic glaze.
5. SERVE IMMEDIATELY: The Reward
Transfer your masterpiece to a serving platter. Sprinkle generously with toasted sesame seeds and the fresh, green onion slices. The contrast in color, texture, and temperature from the garnishes makes the dish visually stunning and even more delicious.
Serving Suggestions & Culinary Adventures
Your Crispy Chinese Honey Garlic Chicken (30 Minutes) is the star, but what you serve it with can turn it into a complete feast.
-
The Classic Combo: Serve it over a bed of fluffy white or brown jasmine rice. The rice is the perfect canvas for soaking up any extra sauce.
-
For a Low-Carb Option: Cauliflower rice is a fantastic alternative. The sauce clings to it surprisingly well.
-
Make it a Feast: Pair it with simple, steamed vegetables like broccoli or bok choy to balance the richness. A quick cucumber salad with a rice vinegar dressing also provides a lovely, refreshing contrast.
-
As an Appetizer: Serve it in a bowl with toothpicks for a party-perfect finger food that will disappear in minutes.
Expert Tips, Notes, and FAQs for Flawless Execution
-
Note 1: Elevating the Marinade. For an even deeper flavor, consider adding a teaspoon of sesame oil, Shaoxing wine, or even a dash of oyster sauce to the egg white mixture. A pinch of red pepper flakes will introduce a subtle heat.
-
Note 2: Doubling the Sauce. If you are serving this as a main dish with rice, I strongly recommend doubling the sauce recipe. Having that extra sauce to drizzle over the rice and chicken is a game-changer and truly replicates the takeout experience.
-
How to Store and Reheat: Store any leftovers in an airtight container in the fridge for up to 2 days. To reheat and restore the crispiness, avoid the microwave. Instead, spread the chicken on a baking sheet and reheat in a 400°F/204°C oven for about 5-7 minutes, or until hot and crisp.
-
Can I make it ahead? Absolutely. You can fry the chicken up to 45 minutes ahead and keep it warm in the oven. Toss it in the freshly made sauce right before serving to ensure maximum crispiness.
Unlock Takeout Magic: Your Guide to Perfect Crispy Chinese Honey Garlic Chicken (30 Minutes)
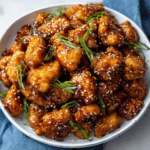
This Crispy Chinese Honey Garlic Chicken is the perfect mix of sweet, sticky, and savory — with that irresistible crunch in every bite. Whether served as a crowd-pleasing appetizer or a quick main dish over rice, it’s a guaranteed favorite that comes together in just 30 minutes.
- Author: alae
Ingredients
For the Chicken:
-
1 lb boneless, skinless chicken thighs or breasts, cut into bite-sized pieces (1–2 inches)
-
Oil, enough to fill a skillet about 1 inch (2.5 cm) deep (Canola or vegetable oil)
Marinade:
-
2 egg whites
-
1 tbsp cornstarch
-
Pinch of salt (or other seasonings — see Notes)
Honey Garlic Sauce:
-
4 tbsp honey
-
2 cloves garlic, minced (or 3 if you prefer stronger flavor)
-
2 tbsp soy sauce
-
1 tsp freshly ground black pepper (adjust to taste)
Optional Garnish:
-
Toasted sesame seeds
-
1 green onion, thinly sliced
Instructions
1. Get Organized
-
Preheat oven to 200°F (93°C) to keep cooked chicken warm.
-
Prepare a baking sheet lined with parchment or foil and place a rack on top (optional but helps keep chicken crispy).
-
Combine sauce ingredients in a small pot large enough to hold all the fried chicken later.
-
Pour oil into a deep skillet or wok until about 1 inch deep.
2. Marinate Chicken
In a bowl, whisk together egg whites, cornstarch, and salt until light and frothy.
Add chicken pieces and let marinate for 10–15 minutes while heating the oil.
3. Heat Oil
Heat oil over medium-high heat to 350–360°F (177–182°C).
If you don’t have a thermometer, dip the end of a wooden spoon or chopstick into the oil — steady bubbling means it’s ready.
4. Fry Chicken
Working in small batches, add chicken pieces to the hot oil and fry for 3–4 minutes, turning once, until golden and crispy.
Remove with a slotted spoon and drain on paper towels.
Place fried chicken on the prepared rack and keep warm in the oven while frying remaining batches.
5. Make the Sauce
Place the pot with the honey garlic sauce over medium-high heat and bring to a gentle boil.
Cook for 1–2 minutes, until slightly thickened. If too thick, add a splash of water.
6. Combine & Serve
Add all fried chicken to the pot and toss to coat evenly in the sauce.
Transfer to a serving plate and garnish with sesame seeds and green onions.
Serve immediately — crispy, sticky, and delicious!
Notes
-
Flavor Boost: Add a teaspoon of sesame oil, soy sauce, oyster sauce, or Shaoxing wine to the marinade. For heat, sprinkle in red pepper flakes.
-
More Sauce: Double the sauce ingredients if serving over rice or noodles.
-
Make Ahead: Keep cooked chicken warm in the oven (200°F/93°C) for up to 45 minutes before tossing with hot sauce.
-
Reheating: Reheat leftovers at 400°F (204°C) for 5 minutes to restore crispiness.
Final Thoughts
The journey to creating this Crispy Chinese Honey Garlic Chicken (30 Minutes) is more than just following a recipe; it’s about reclaiming the joy of cooking and the pride of creating something truly special with your own hands. This dish proves that you don’t need specialized equipment or a culinary degree to produce food that rivals your favorite restaurant. It demonstrates that with a little understanding of technique and the confidence to try, you can unlock a world of flavor right in your own kitchen.
The magic of this recipe lies in its perfect harmony—the exhilarating crunch that gives way to juicy chicken, all enveloped in a sauce that is the very definition of moreish, striking that impeccable balance between sweet honey and pungent garlic. It’s a dish that will impress guests, satisfy the deepest of cravings, and, most importantly, become a reliable, go-to favorite in your weekly meal rotation.
So, the next time that takeout craving hits, remember this recipe. You have the power, the knowledge, and the 30 minutes to create something even better: a homemade version, made with care, and served with the pride of a chef. Happy cooking